Change Version of Minecraft to an Older One
In order to play on a server, you may need to change your Minecraft version to match that of the server. To do this, go to Installations in the Minecraft Java Launcher and create a New Installation.
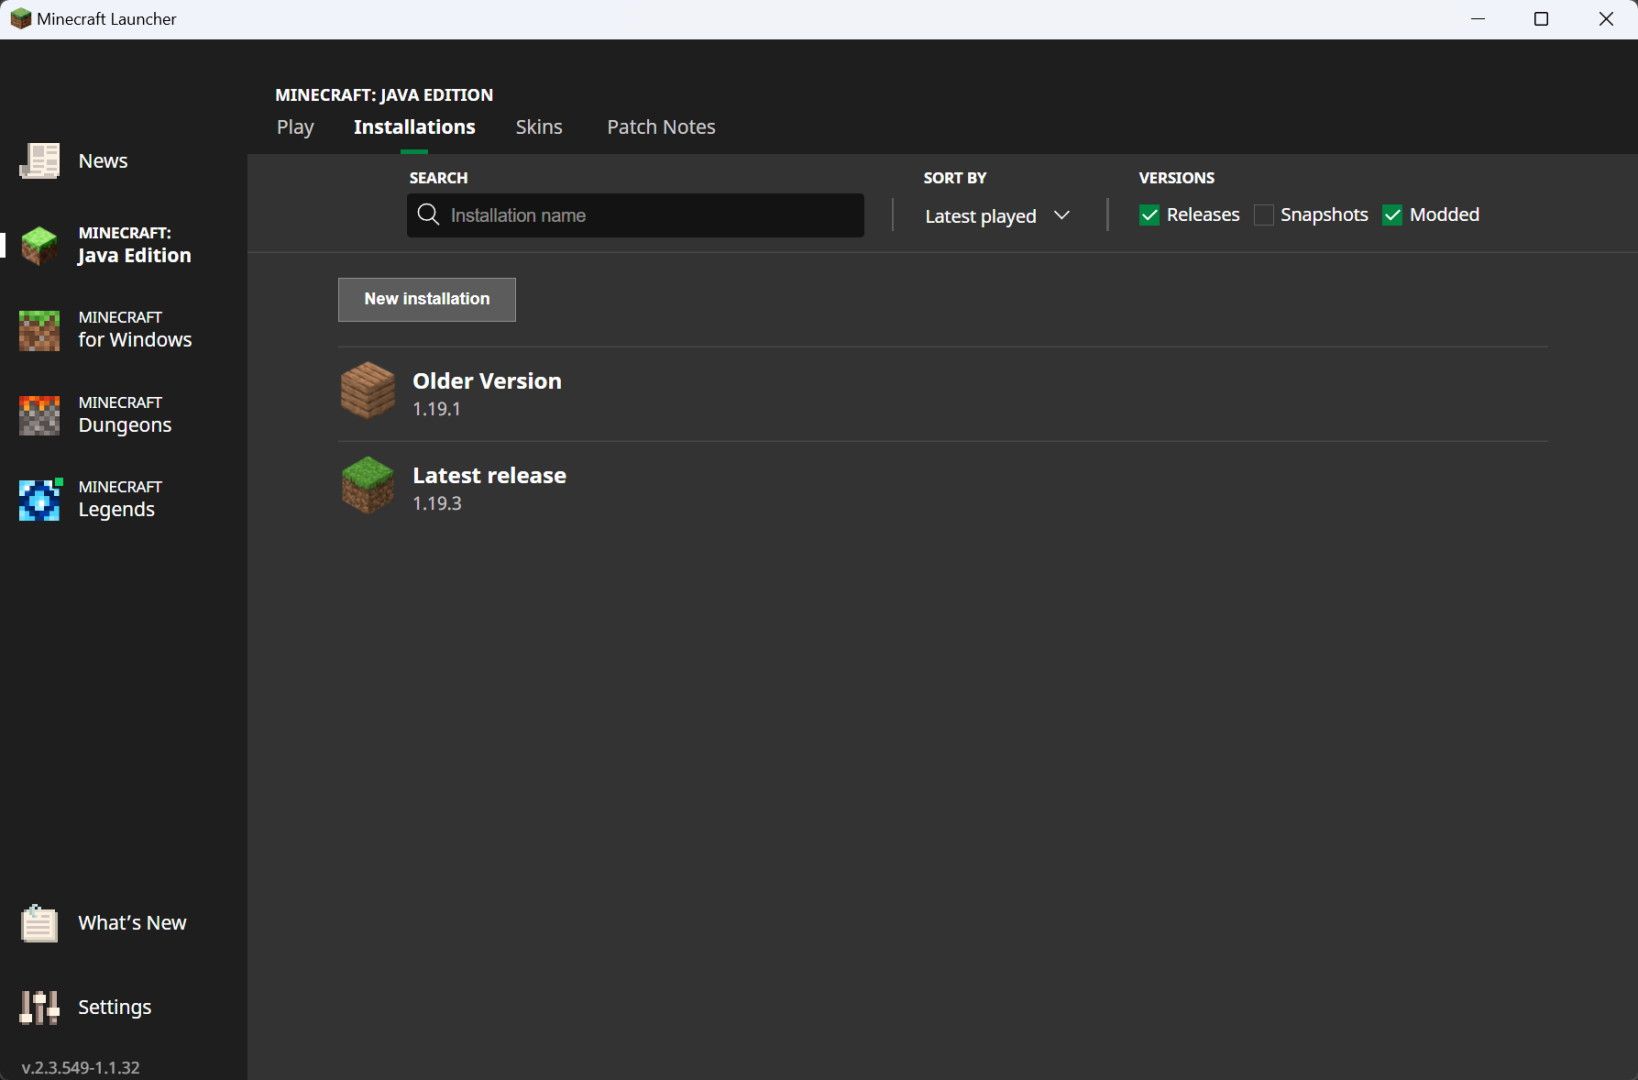
You give this installation a name and here you can also change the icon of the installation. Under Version, you select the desired patch and at the same time check the allocated RAM under More options.
You can find out how to change the RAM to a reasonable value in the next section. Finally, click Create and this will allow you to play on an older version of Minecraft.
Minecraft Lags? Increase RAM in the Launcher!
Only 2GB of RAM is allocated by default in the Minecraft Java Launcher. If the RAM is full, you will notice this through lag and freezes.
To increase RAM, go to Installations. There you click on the installation of Minecraft that you want to allocate more RAM to.
Click More Options at the bottom. There you will find JVM arguments that you can change.
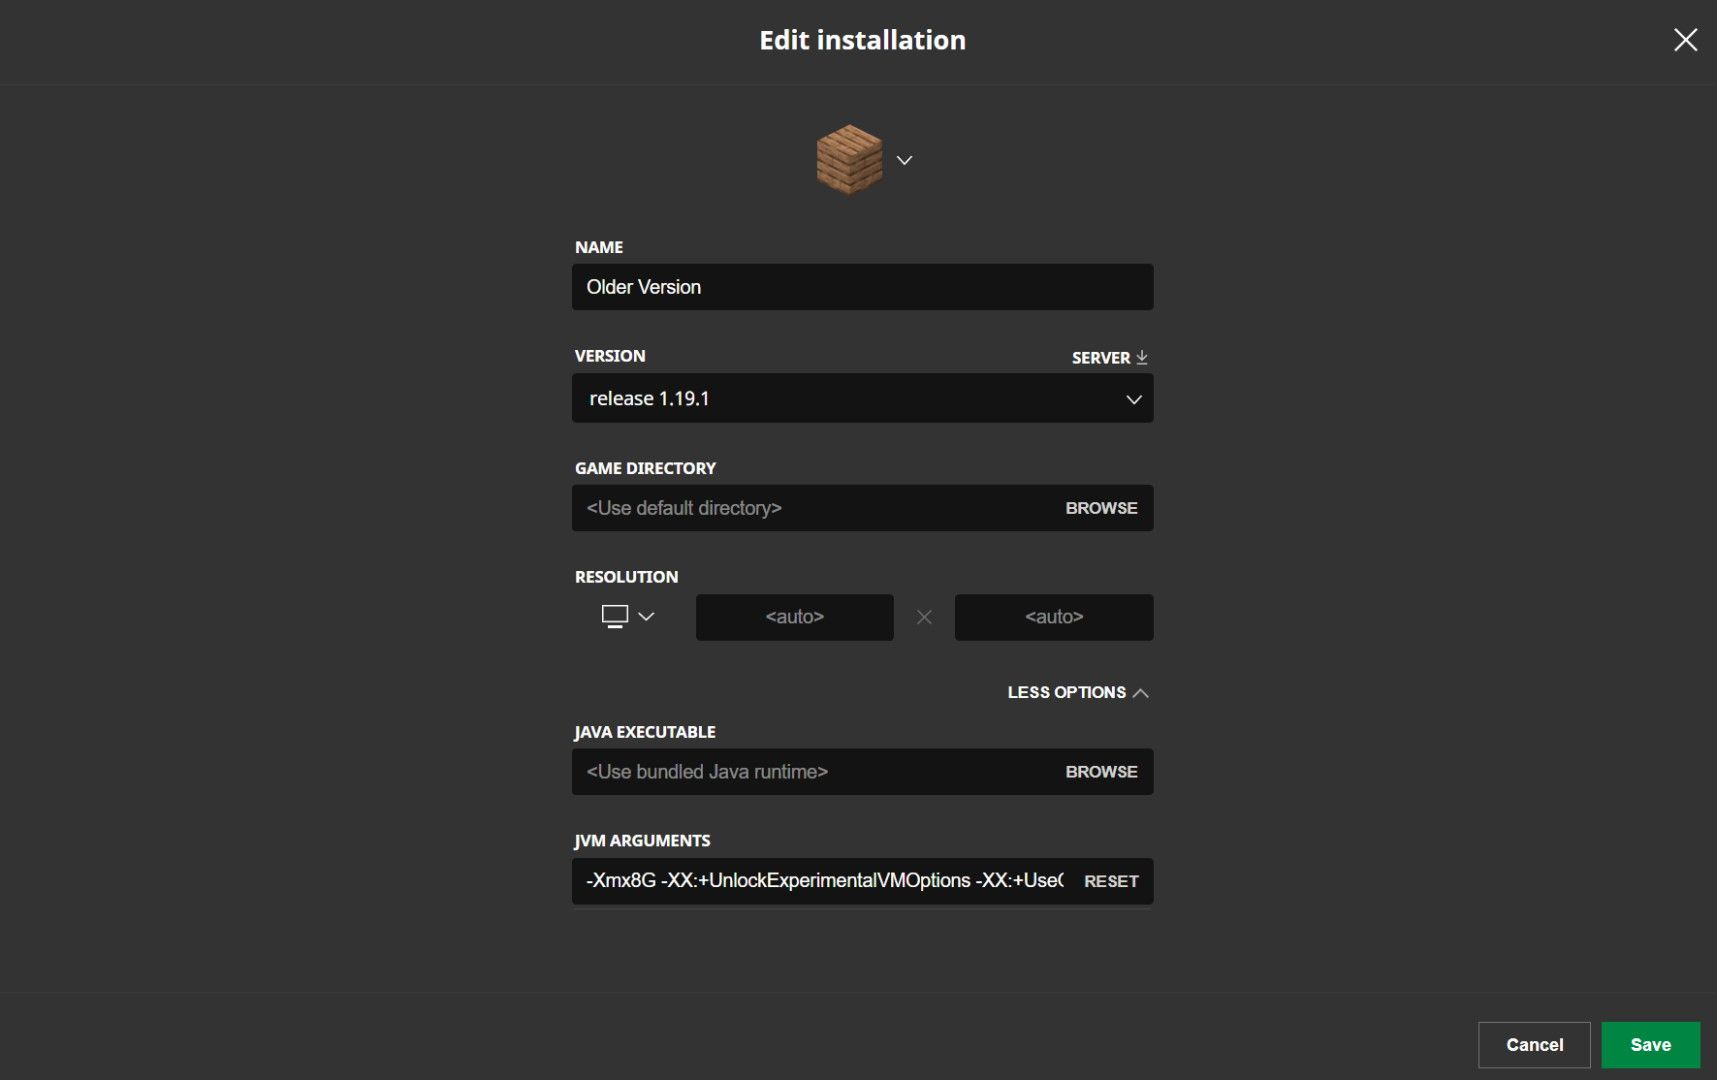
By default, this text is in the JVM arguments:
-Xmx2G -XX:+UnlockExperimentalVMOptions -XX:+UseG1GC -XX:G1NewSizePercent=20 -XX:G1ReservePercent=20 -XX:MaxGCPauseMillis=50 -XX:G1HeapRegionSize=32M
The "2" in the first argument represents the GB of RAM available for Minecraft. You can change that to 8 or 16 GB, for example, and save it.
-Xmx8G
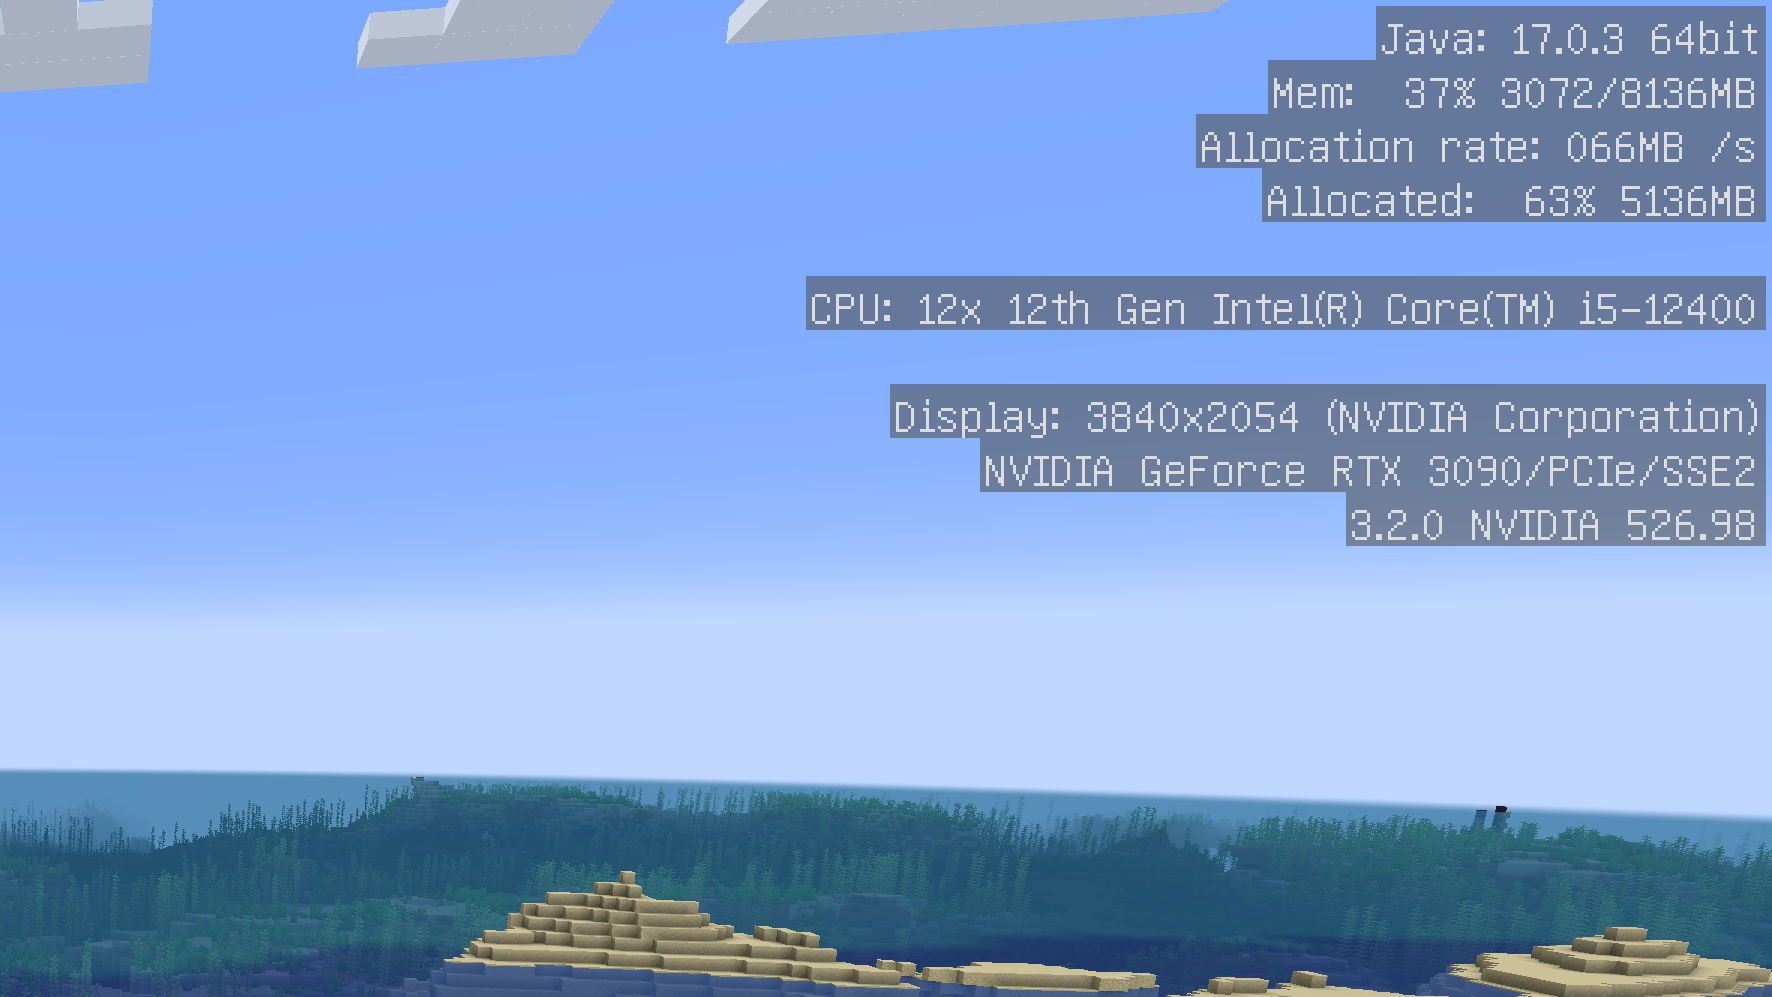
In Minecraft, you can check whether your changes were applied correctly. To do this, press F3 in the game, which opens the debug screen. The 8GB memory should now appear at the top right.
If you have an Nvidia graphics card, it can also help to select Minecraft in Nvidia GeForce Experience and optimize the game. With this, the tool selects the optimal game settings for your PC.


If you press this button it will load Disqus-Comments. More on Disqus Privacy: Link