
To display the current Spotify song in your stream on Twitch or YouTube (or wherever), all you have to do is add Spotify as a source in your OBS.
Add Spotify as a Source
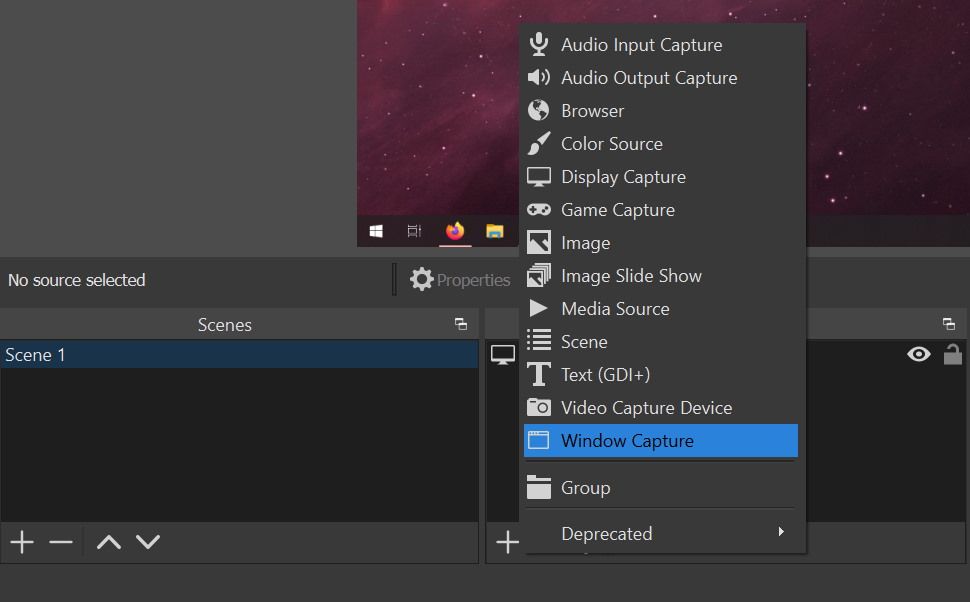
First, create a new source by clicking the plus (+) and then on Window Capture.
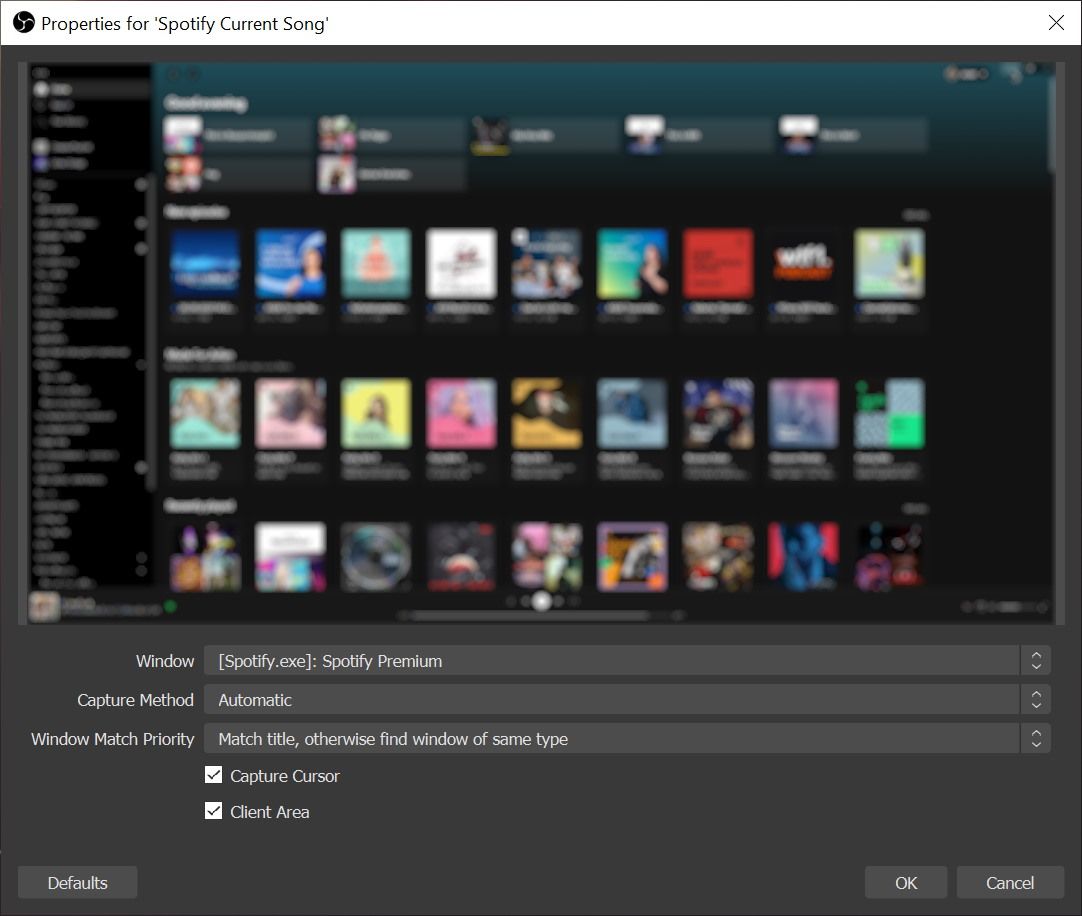
A dialog opens in which you can name the source. For example, I named the source "Spotify Current Song". Confirm with OK.

Of course, you select Spotify as the Window (or whatever you play your music on). You don't have to change anything else in the settings. Confirm again with OK.
Crop the Size of the Scene
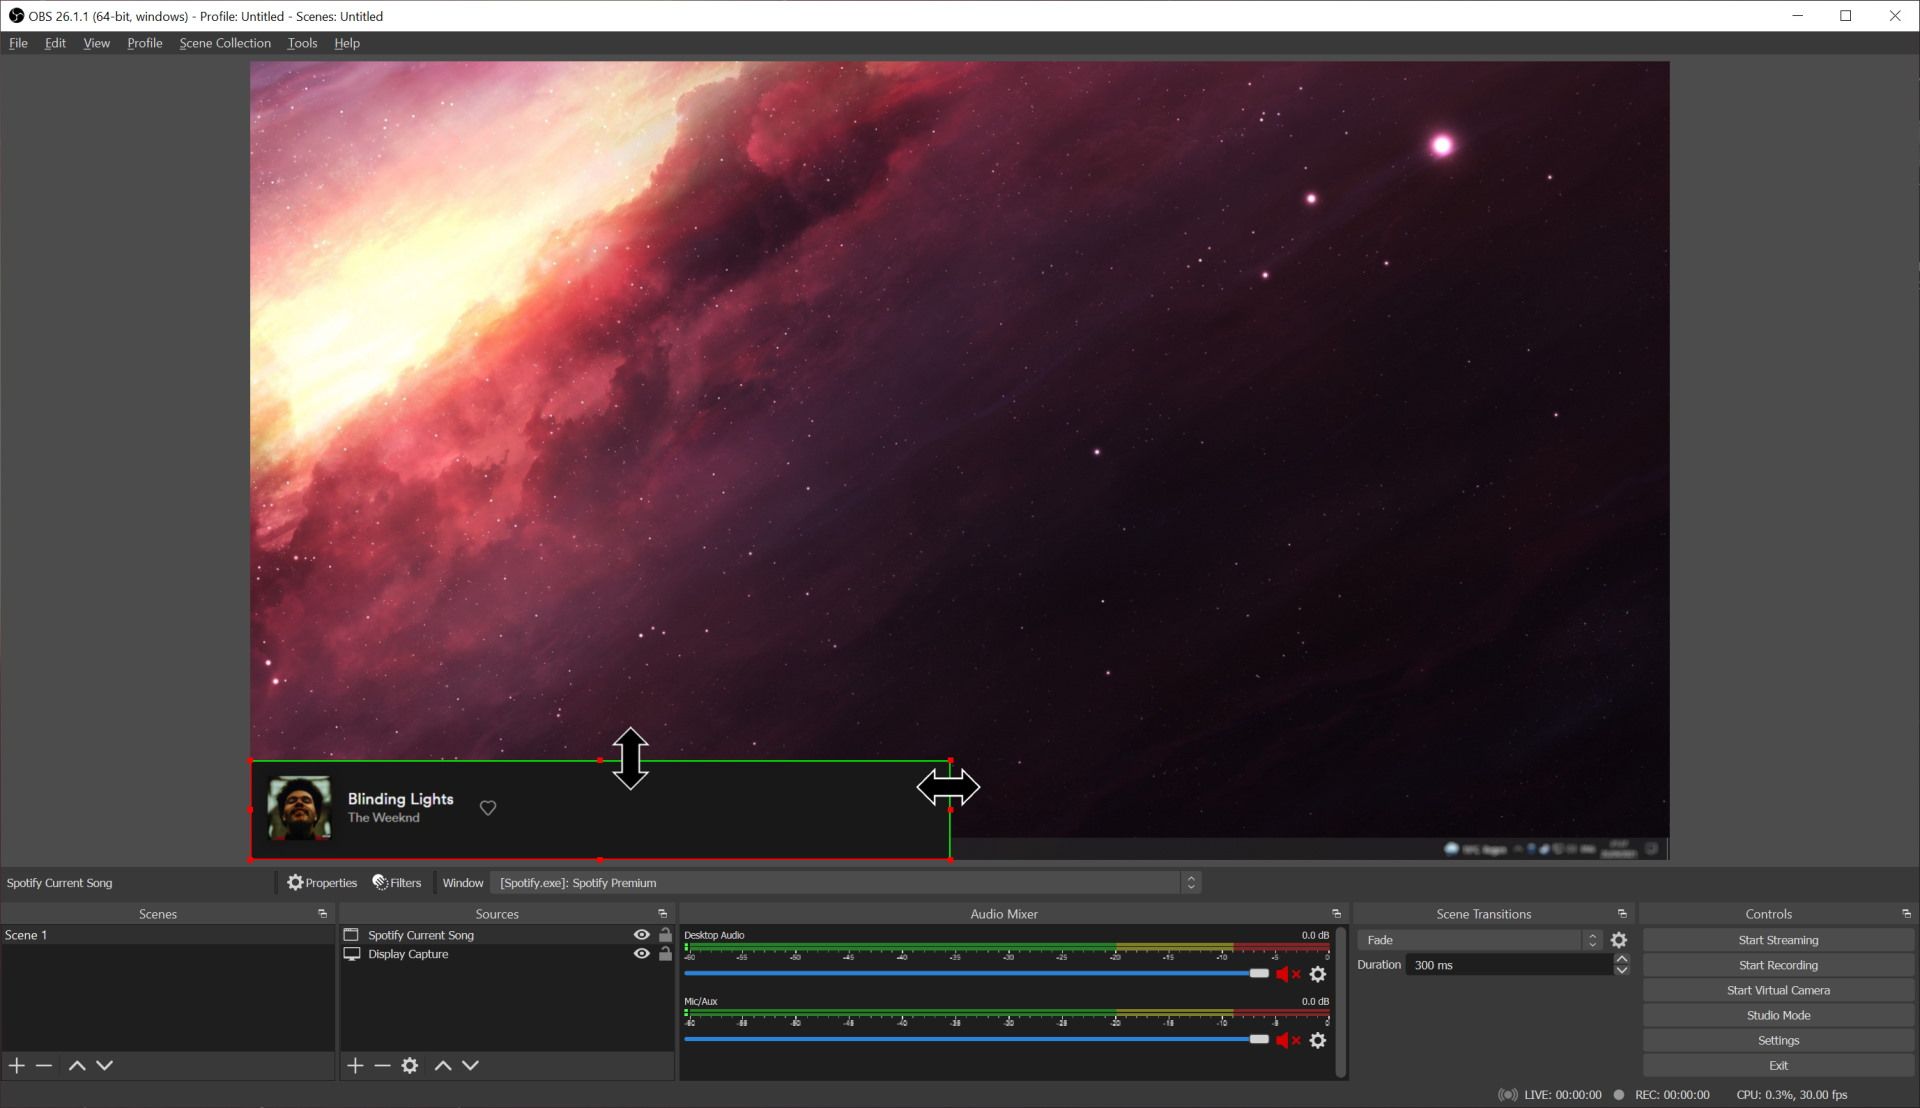
As in the picture below, it is important that the Spotify window is placed on top of the display capture. This is the only way to actually see the Spotify player in your screen recording.
Now that the entire Spotify window is being recorded, you have to cut it. To do this, move the mouse to the edge of the Spotify window and drag the window smaller while you hold down the ALT key. This will cut out the area that you want to remain.
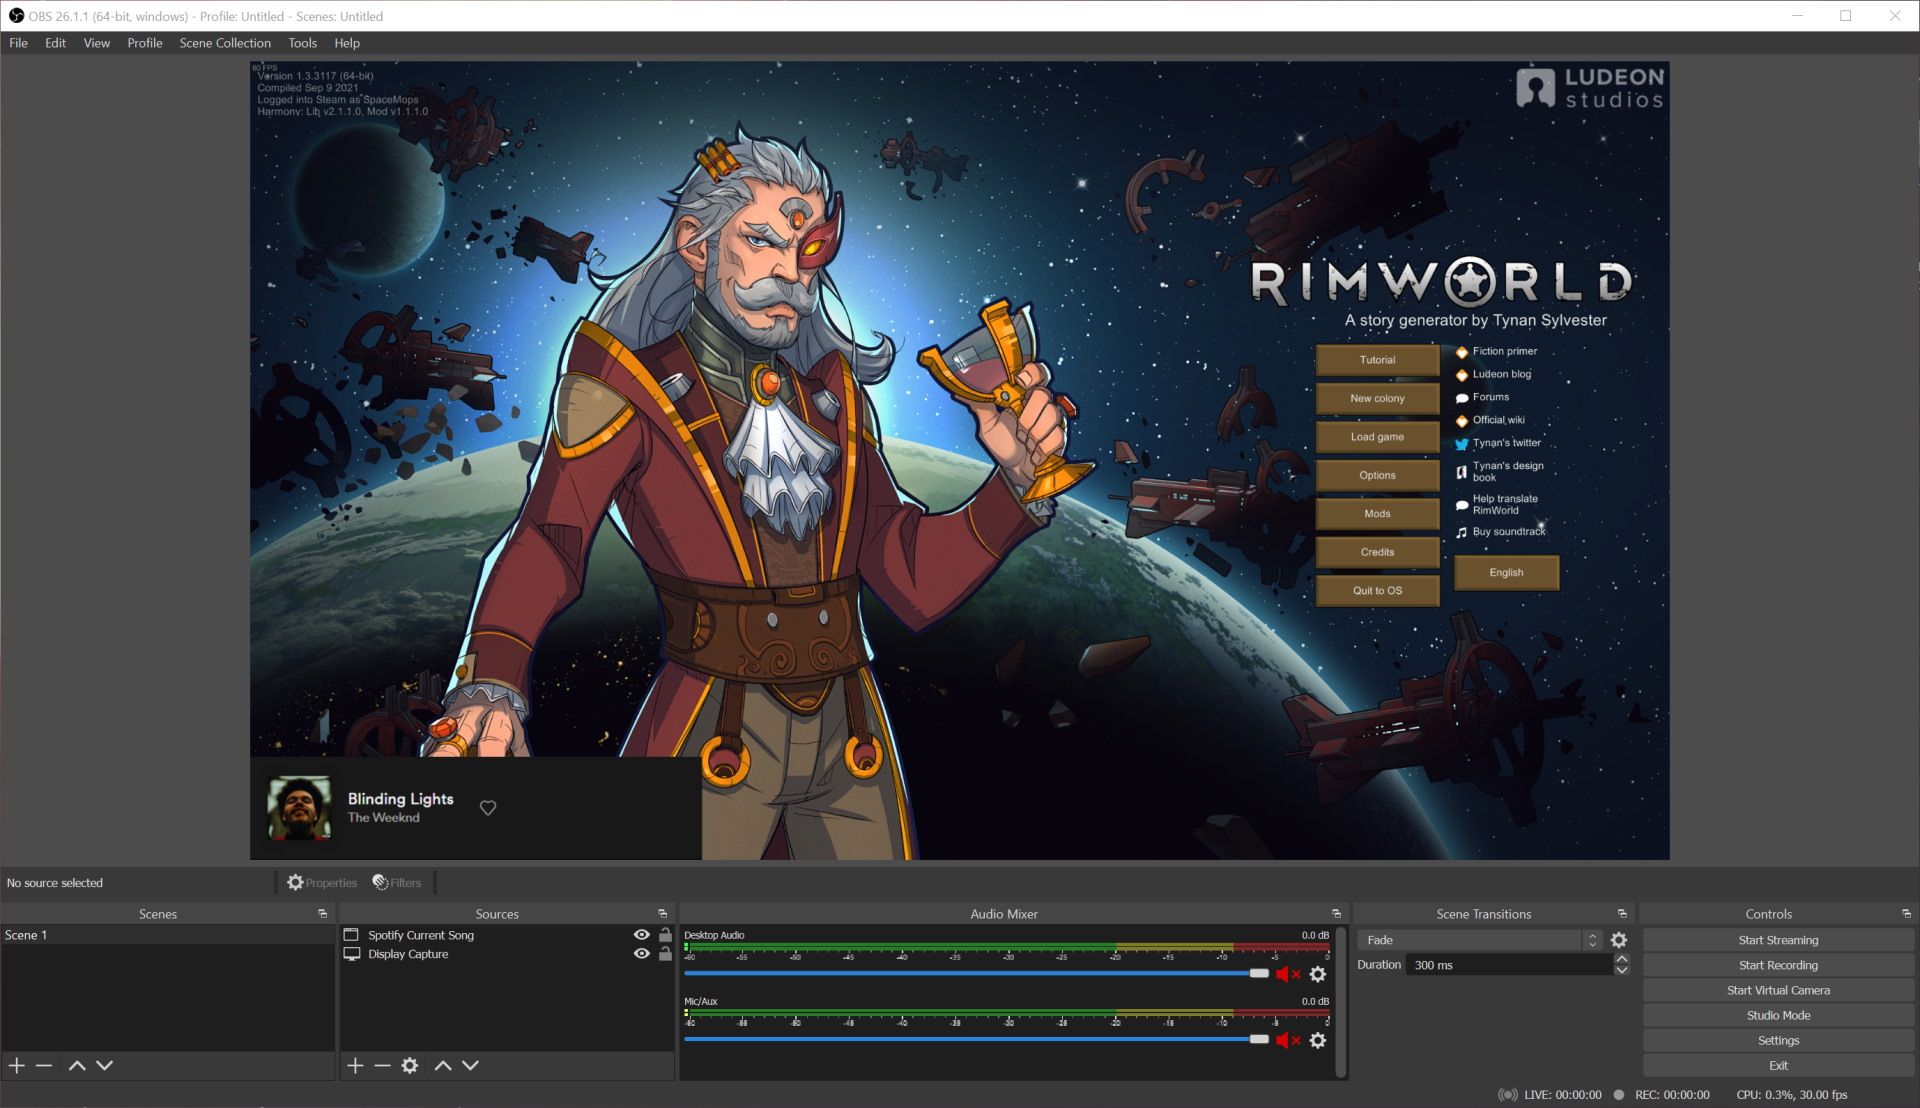
If you now open any game, such as RimWorld, the current Spotify song will always be shown in the stream. This way you can play your game, while your viewers can see the music you listen to at any given point.


If you press this button it will load Disqus-Comments. More on Disqus Privacy: Link